How to make crop circle tables.
1. You need two sheets of multiplex plywood, one 6 mm thick and the other 12 mm thick. For the 4-person round table saw both sheets slightly larger than 75 cm diameter. For the 2-person oval table saw the sheets slightly larger than an oval 46 cm by 67 cm. These are rough cuts done with a jigsaw, the fine sawing with an electric fretwork saw (or scroll saw in the U.S.A.) will come later.
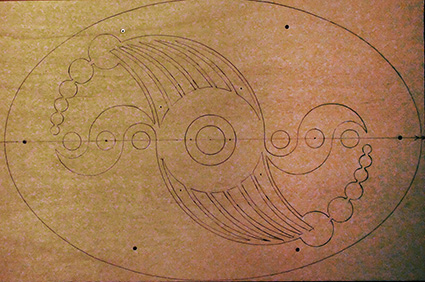
Enlarge the crop circle pattern you want to duplicate and have your local photocopy shop print it in black and white to fit neatly inside your circle or oval. Tape this pattern to the 6 mm sheet of wood and use a sharp pointed instrument like an awl (priem in Nederlands) to prick all along the outlines.
Remove the paper and connect the tiny holes in the wood with a pencil.
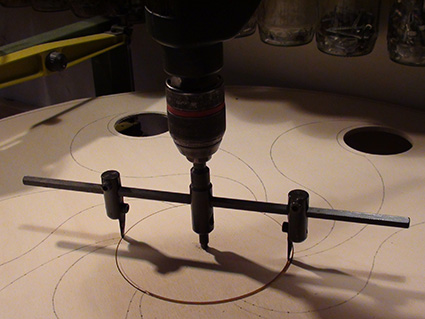
2. Cut all circles in the pattern with a hole cutter. To avoid chipping, cut halfway through from one side, then cut all the way through from the other side.
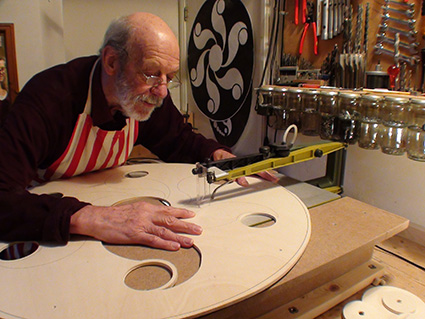
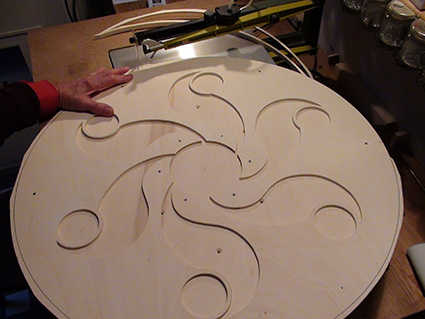
3. Saw the rest of the pattern with an electric fretwork saw. I made the table supporting the wood larger by building a platform around the sides and front of my saw. With such large sheets of wood, it may be necessary to reverse the blade on occasion so the teeth are facing away from you. I use “reverse” blades, where the bottom few teeth are pointing upwards. This makes for cleaner cuts. When finished sawing the pattern, sand away imperfections.
4. Screw the 6 mm sheet to the 12 mm sheet with about 6 small (12 mm long) screws evenly spaced inside the oval or circle. You can add a few more screws to help the 6 mm sheet lie flat when glueing it to the 12 mm sheet later. Now carefully saw along the perimeter with the fretwork saw to make a perfect circle, or oval. Lightly sand.
You now need to drill holes through the 12 mm sheet, with countersink, for the bolts that will attach the table top to the leg. At the top end of the cast iron leg I favour, there is a detachable metal plate. Using this plate I mark where the holes must be drilled.
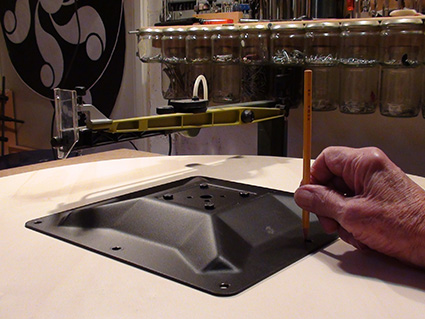
The plate must be centred. I rotate it so that as many as possible of the bolts will be hidden under the 6 mm sheet eventually. Now drill tiny holes (1 - 1.5 mm) through both sheets of wood. Unscrew and separate the sheets of plywood. Drill the holes for the bolts through only the 12 mm sheet. I drill 5 mm holes for 6 mm bolts, so they fit snugly, plus countersinks so the bolts are flush with the wood.
5. Paint the underside of the 12 mm sheet a very dark green (or colour of your choice). Add two coats of outdoor clear varnish. Now screw the 6 mm bolts through the 5 mm holes, but before the last few turns apply strong 2-component glue to the thread of the bolts so that they won’t work loose later.
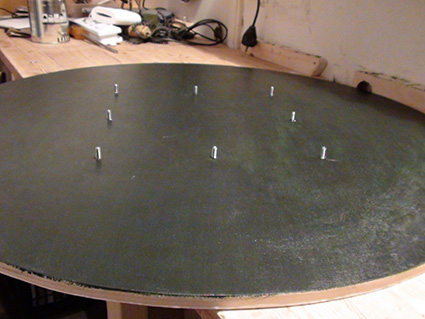
When the glue is dry (usually after 24 hours) cover the heads of the bolts with filler (I use 2-part white polyester filler). When dry, sand level. Then paint the top of the 12 mm sheet white. (Later, when you add two coats of clear varnish, the white will become warmer.) Now paint the top and inside edges of the patterned 6 mm sheet very dark green (or colour of your choice).
6. Spread wood glue on the underside of the 6 mm sheet and glue and screw it to the 12 mm sheet. All screw heads must be countersunk
Cover the screw heads with filler. When dry, sand level. Touch up with the dark green paint. Paint the outside edge of the table top dark green, and add at least two coats of clear outdoor varnish to prevent moisture entering between the layers of plywood.
7. Use clear varnish to paint the white parts of the pattern, paying special attention to the edges. Apply two coats. This seals the edges so that no air accidentally trapped between the layers escapes later when adding the clear epoxy coats, causing air bubbles in the epoxy. This step is really important.
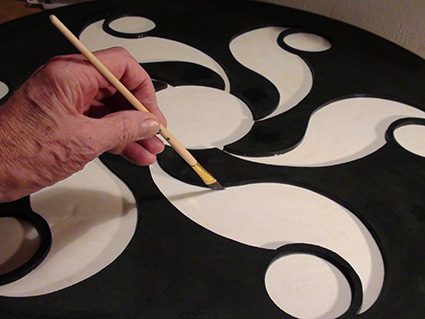
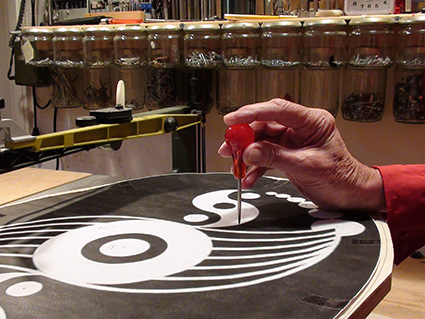
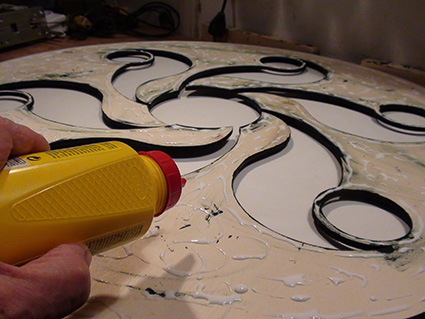
8. You are now ready to add the shiny metallic gold (or colour of your choice) of the wheat crop. I use a flat-topped paint brush with clumps cut short with nail scissors, leaving me with a six-pronged brush, messy but effective.
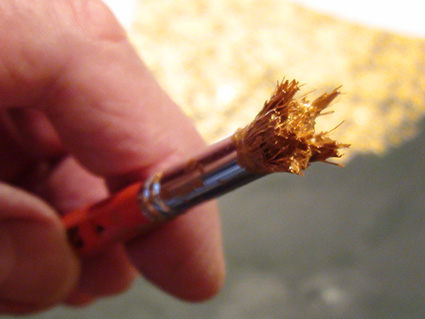
Holding the brush perpendicular, add the speckled gold coat. (Practice first!)
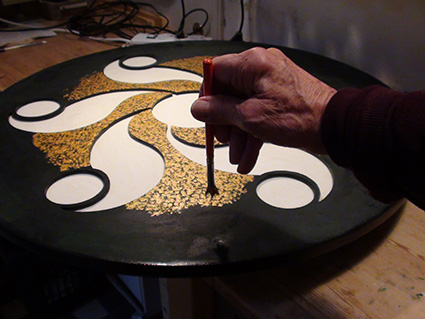
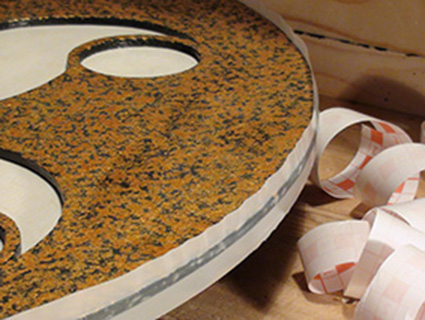
9. Below is what your table top should look like, before adding the clear epoxy.
10. Paste double-sided sticky tape (about 6 mm wide) along the top edge of the rim.
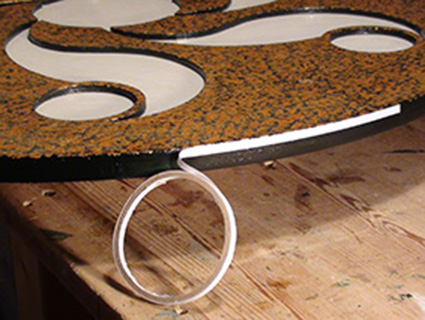
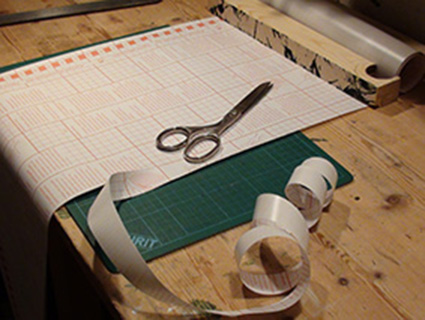
11. You now need some sturdy tape to form the dam wall. I use opaque plastic window decoration “foil” 250 cm long (shorter for oval tables) and cut a strip 3 cm wide. It is sticky on one side, which you don’t need, but the tape is sturdy and that’s what matters.
12. Line this 3 cm strip up with the bottom of the table’s rim (sticky side out!) and press it onto the double-sided tape. The dam “wall” now protrudes about 12 mm above the table. Run your thumb nail along the backing paper to make sure the plastic sticks firmly to the double-sided tape, especially the top edge. Then remove backing paper.
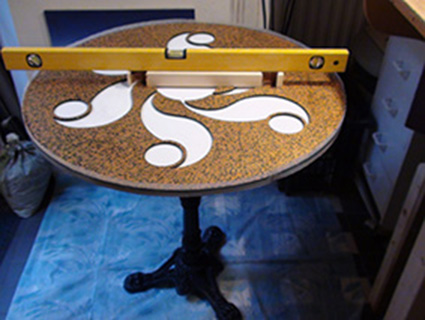
13. Bolt the table top to the leg, then make sure it is level. I spread a plastic sheet on the floor to catch any drips.
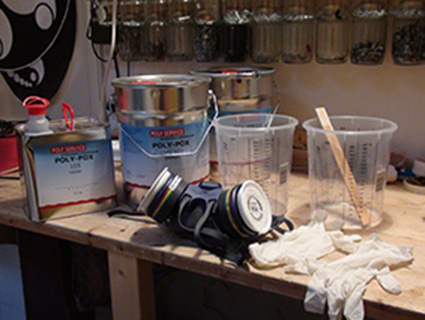
14. Wear a good quality air filter and latex gloves, and measure out the epoxy and the hardener in separate mixing containers, then mix according to the manufacturer’s instructions. You need to apply two coats. When the first coat has dried for 24 hours, you can pour the second coat. If done within 24 hours, you do not have to sand between coats. Two coats are necessary because the epoxy mix does shrink a little, with the result that the epoxy in the deeper parts of the pattern will lie a little lower than the rest. The second coat makes the surface level.
After pouring the epoxy mix into the “dam”, make sure it covers the entire surface. Use a hair dryer, or fan with a heating element, to blow warm air onto the epoxy for about 20 minutes. This gets rid of air bubbles. The first coat is thicker than the second coat, so one or two air bubbles might remain. You can pierce them with a drill after 24 hours, before pouring the second coat, which will make the drilled bits again become transparent
I use Poly-pox UVG 503 epoxy, 2 parts to 1 part hardener by weight. The plastic mixing containers I use are calibrated in ml’s, so I will give the quantities in ml’s, for first and second coats, for round and oval tables.
Round tables:
1st coat - 1175 ml epoxy to 675 ml hardener making a total of 1850 ml
2nd coat - 761 ml epoxy to 437 ml hardener making a total of 1198 ml
Oval tables:
1st coat - 783 ml epoxy to 450 ml hardener making a total of 1233 ml
2nd coat - 522 ml epoxy to 300 ml hardener making a total of 822 ml
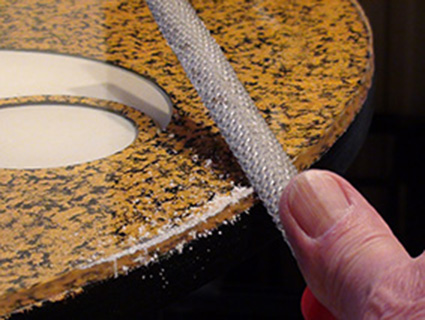
15. Remove the tape forming the dam wall 24 hours after pouring the second coat. You will probably need to scrape a little, maybe use a solvent, to remove stubborn bits of the double-sided tape. You will notice the epoxy has dried leaving a slight “lip” at the edge of the table. I use a rasp to remove the bulk of this lip, finishing with sandpaper. Also sand the rim lightly, touching up with the very dark green paint. Paint the rim and the top edge of the rim with 2-part DD clear varnish. This makes the sanded epoxy transparent again.
16. Last step: stand in a field, look up at the sky, and yodel joyfully.
To read breaking news, click on: http://brekendnieuws.nl/01-12-15-graancirkels-inspiratiebron-voor-meubelmaker.html